This week has been busy for us here in Llama land. We decided that holiday traveling with a two year old just was not a good idea, so we couldn't go back up north to visit family, which made all of us sad. But to make up for it my parents came down here to visit for the day. They brought presents from the rest of the family, and we had a nice time visiting. This year, including birthday presents (last week was his birthday), the Llama received several puzzles, wooden blocks, a Melissa & Doug Shape, Model and Mold kit for play dough, new crayons, markers, stickers, coloring books, and drawing paper, as well as new clothes, a xylophone, and a corn popper push toy, and of course tons of books. The Llama Poppa got new boots, I got a new stick blender, and we all got Amazon gift cards; happiness all around.
Then it was The Llama's two-year Pediatrician visit. He weighs 37 lbs and is 37 inches tall! Unfortunately it was not a happy visit for him; the nurses were scary, this was his first time on the big kid's scale and it was wobbly and scary, he didn't like being examined one bit, and then they had to give him the flu vaccine (we got the nose drops, which was better than a shot, but still scary) and then his two-year finger pick to check for lead. Everything came out perfectly, the doctor said he was awesome. But he was NOT happy, my poor little guy. Thankfully he seemed to calm down best when we gave him a pen and let him draw on the flu vax info sheet. I'm glad that he has discovered such an easy method of calming himself, and that it's making art. When we got home we played with play dough and some of his other new toys, then after dinner we had a nice long bath time with lots of splashing and he was good as new, and most definitely ready for bed!
Hopefully now everything will calm down a little bit and we can get ourselves back to normal. After the new year I'll be taking down the decorations (which the Llama LOVED). And we can start getting back into our routine, but with more time for drawing and art, because the Llama obviously loves it.
Thursday, December 29, 2011
Thursday, December 15, 2011
Mock Tuna Salad
When I was a kid, one of the few fishes I would eat was tuna, and then only in surprise or in sandwiches. I've been craving tuna sandwiches lately, so I went looking for Vegetarian recipes, then I smashed them all together and came up with this:
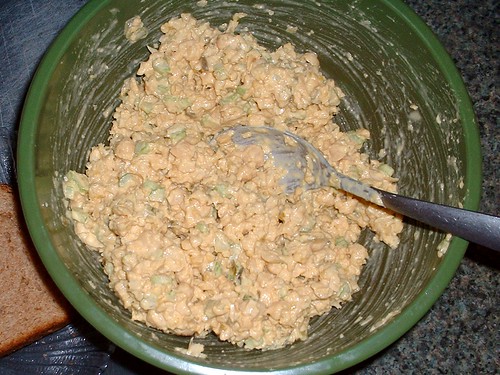
Chickpea “Tuna” Salad
3 C cooked chickpeas
1/4 C mayo
1/4 C nutritional yeast
2 Tbsp soy sauce
1 Tbsp powdered nori (just take a sheet or two of nori and run it through the spice grinder)**
1/4 C celery, diced small
3 Tbsp sweet pickle relish
Run the chickpeas through the food processor until they are roughly chopped and crumbly, or alternately mash them with a fork and your hands.
Stir the rest of the ingredients together in a bowl, then add the chickpeas and stir until everything is coated evenly. This will make about 5 sandwiches.
(This recipe is similar to how I used to make it as a kid, but a lot of recipes left out the relish and added dijon mustard, some had scallions added in, and some left out the celery. Essentially the main parts of the recipe are the first 4-5 ingredients**, after that you can pretty much just add what you did as a kid.)
**the reason I didn't eat a lot of fish as a kid was I hated that 'fishy' taste, so I didn't add the nori and it was great!
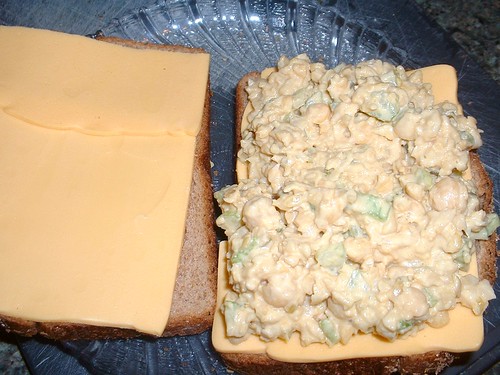
(needs lettuce and tomato, but we were out, ah well.)

Chickpea “Tuna” Salad
3 C cooked chickpeas
1/4 C mayo
1/4 C nutritional yeast
2 Tbsp soy sauce
1 Tbsp powdered nori (just take a sheet or two of nori and run it through the spice grinder)**
1/4 C celery, diced small
3 Tbsp sweet pickle relish
Run the chickpeas through the food processor until they are roughly chopped and crumbly, or alternately mash them with a fork and your hands.
Stir the rest of the ingredients together in a bowl, then add the chickpeas and stir until everything is coated evenly. This will make about 5 sandwiches.
(This recipe is similar to how I used to make it as a kid, but a lot of recipes left out the relish and added dijon mustard, some had scallions added in, and some left out the celery. Essentially the main parts of the recipe are the first 4-5 ingredients**, after that you can pretty much just add what you did as a kid.)
**the reason I didn't eat a lot of fish as a kid was I hated that 'fishy' taste, so I didn't add the nori and it was great!

(needs lettuce and tomato, but we were out, ah well.)
Thursday, November 24, 2011
Homemade stuffing from scratch
Happy Thanksgiving to all my American friends; I hope everybody had a great day!
Here is a super simple recipe for you.
When I first made this it was so easy (and delicious!) that I was truly baffled as to why people used the boxed stuff.
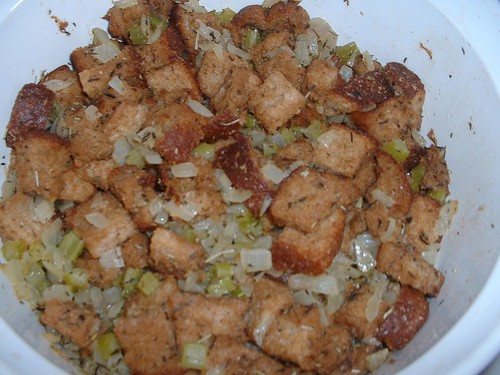
Homemade stuffing from scratch
5 C whole wheat bread cubes (see below)
1 med/small onion – diced fine
2 stalks celery – diced fine
1/4 stick butter (2 Tbsp)
1 tsp dried thyme
1/4 tsp dried rosemary – crushed (I throw it into my spice grinder and pulse it a few times)
1/4 tsp Italian spice mix (optional, recipe below)
1 1/4 C veggie broth
The night before, slice about 5 slices of whole wheat bread into cubes. Spread them on a cookie sheet and bake at 200 degrees F for about an hour or until they are dried out and hard.
Before dinner, melt the butter and saute the onion and celery until the onion goes translucent. Add the herbs and broth. Bring to a simmer.
Dump the bread cubes into a casserole dish and toss with the onion mixture until everything is evenly coated and well mixed. Don't worry of some if the cubes are still crispy.
Cover and bake at 325 degrees for 20 minutes. Uncover and bake another 10 minutes, and it's done!
***
Italian Herb Blend
(When I make it 1 Part = 1 Tbsp, but you can make bigger or smaller batches as desired.)
3 parts basil
2 parts each, marjoram, oregano, & thyme
1 part rosemary, crushed
Here is a super simple recipe for you.
When I first made this it was so easy (and delicious!) that I was truly baffled as to why people used the boxed stuff.

Homemade stuffing from scratch
5 C whole wheat bread cubes (see below)
1 med/small onion – diced fine
2 stalks celery – diced fine
1/4 stick butter (2 Tbsp)
1 tsp dried thyme
1/4 tsp dried rosemary – crushed (I throw it into my spice grinder and pulse it a few times)
1/4 tsp Italian spice mix (optional, recipe below)
1 1/4 C veggie broth
The night before, slice about 5 slices of whole wheat bread into cubes. Spread them on a cookie sheet and bake at 200 degrees F for about an hour or until they are dried out and hard.
Before dinner, melt the butter and saute the onion and celery until the onion goes translucent. Add the herbs and broth. Bring to a simmer.
Dump the bread cubes into a casserole dish and toss with the onion mixture until everything is evenly coated and well mixed. Don't worry of some if the cubes are still crispy.
Cover and bake at 325 degrees for 20 minutes. Uncover and bake another 10 minutes, and it's done!
***
Italian Herb Blend
(When I make it 1 Part = 1 Tbsp, but you can make bigger or smaller batches as desired.)
3 parts basil
2 parts each, marjoram, oregano, & thyme
1 part rosemary, crushed
Saturday, November 12, 2011
Mushroom Risotto
Earlier this week the Llama Papa had to go out of town for a couple of nights; it was rough, but we made it through. My mother came down to help out while he was gone, (thanks Mom!) and to thank her I made one of her favorite dishes, Mushroom Risotto. She loved it and I decided type up the recipe for her, and while I was at it, make a blog post!
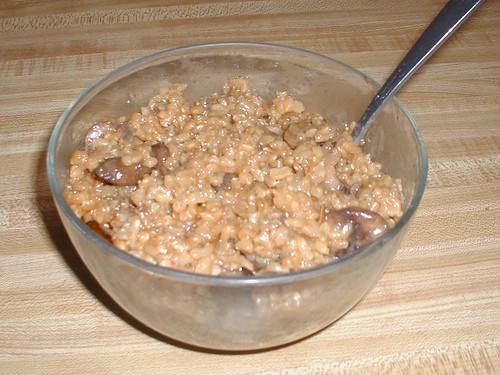
Mushroom Risotto
Ingredients:
3 C short grain brown rice (put the rice to soak in the morning)
2/3 - 1 C dried Porcini mushrooms
1 lg onion, chopped
8 oz White Button mushrooms, sliced
8 oz Baby Bella mushrooms, sliced
3 C vegetable stock
1 C dry white wine
fresh Parmesan cheese
Roughly chop the porcini mushrooms, place them in a bowl and cover in boiling water. Let sit.
Put the stock into a saucepan along with 3 cups water and bring to a bare simmer.
Meanwhile, Saute the onion in olive oil over medium heat until they turn translucent. Add the fresh mushrooms and saute until they release their juice and the liquid is evaporated.
Strain the soaking porcini mushrooms, reserving the liquid, and add them to the onion mixture.
Drain the rice and add it to the pot, stirring for a minute or so to warm and coat it with the oil.
Add the wine and the reserved mushroom liquid, raise the heat slightly to medium high and cook, stirring often until it has all evaporated.
Add several scoops of stock until the rice is covered and let cook, stirring often until the liquid is mostly gone. (If the liquid is boiling to high and evaporating too fast, reduce the heat back to medium.) Repeat this process until all the stock is used,this should take between 30-40 minutes. Taste the rice; it should be al dente (slightly chewy, but not crunchy). If it is not fully cooked, continue adding hot water, cooking and stirring often until the rice is cooked and lightly coated by a delicious creamy sauce.
Salt and pepper to taste.
Serve with a topping of freshly grated Parmesan cheese, and a glass of the remaining wine.
Adapted From the Risotto with Mushrooms recipe in Vegetarian by Linda Fraser
Sunday, October 30, 2011
Great Expectations
Over the summer we were rather lax about clothing, and we were lucky to get the Llama into a shirt let alone any other clothes. The only time he got fully dressed was when were were going out for a walk (rare with the high summer temps) or out to the store. But as the weather gets colder we've been trying to keep him dressed so he stays warm. Unfortunately, he has come to associate pants with going out. So once we have him dressed in the morning he gets really excited, and then really upset when he realizes we aren't taking him out right then.
Things like that have been happening a lot recently, the Llama will get an idea in his head, and get really excited about whatever he expects, and then has a meltdown if it doesn't happen. This is quite normal, but so hard for us. I know how it feels to expect something and get your hopes up and get really excited, and then not have it work out. Its a real downer! We've been working on emotion coaching and delayed gratification, but he's still young and that stuff is still a bit advanced for him, so for now we just let him know we understand.
But I gotta admit it's really hard to see him so sad. I know that sometimes to an adult the things he gets upset over seem trivial, but he's just a toddler and things are different for him; the world is so much bigger and the little things are so much bigger to him too. I know he'll understand and learn how to handle his disappointment, but for now all I can do is hug my little boy because he really wanted to go for a walk, but we aren't going until later and he doesn't understand.
Sunday, October 16, 2011
NY Sheep and Wool
Warning! Tons of pictures!
We just got back from the NY Sheep and Wool Festival. I didn't buy any yarn this year, but The Llama got to see a ton of his namesakes, and pet tons of sheep and goats.
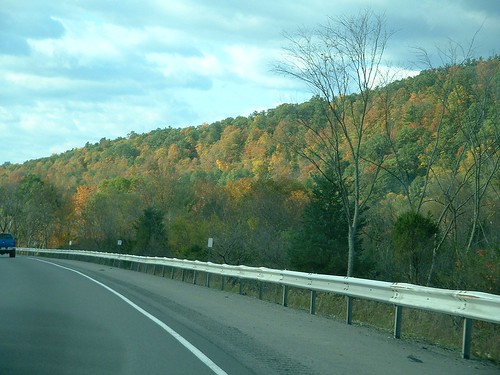
It was a beautiful ride down (and back) but The Llama missed most of it because he fell asleep both ways.

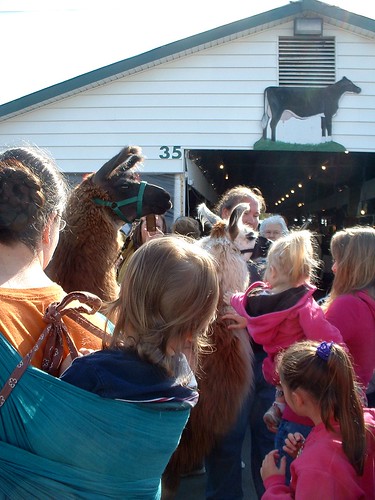
We arrived just in time for the llama parade. We couldn’t really get close enough to pet any of them, but The Llama enjoyed pointing at them, and there was much squealing and giggling.
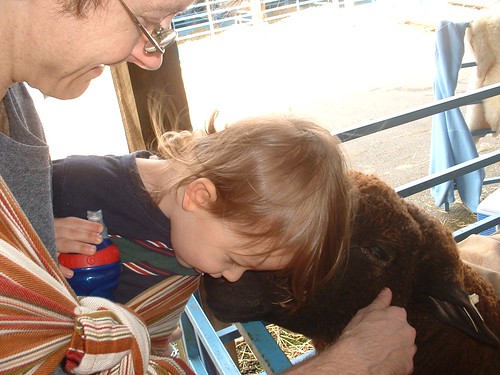
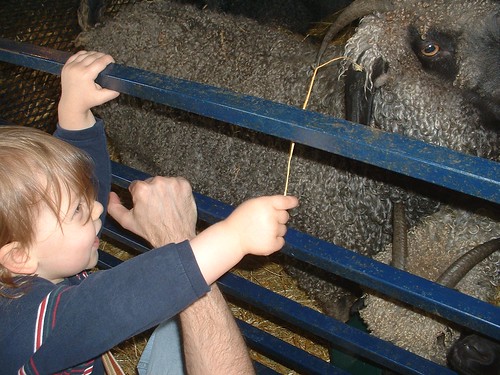
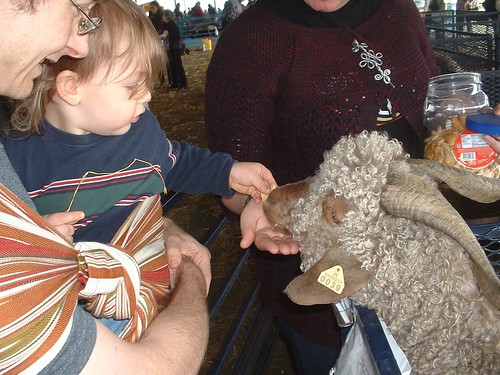
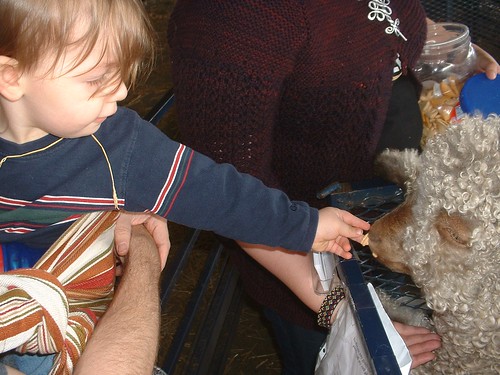
After a break for a snack and some time to run around we headed over to the sheep barn. The Llama LOVED petting the sheep, and kept trying to rub his face against them (we have a cat and he has learned from her how to show affection) he was fascinated when they Baa-ed and kept baa-ing back.
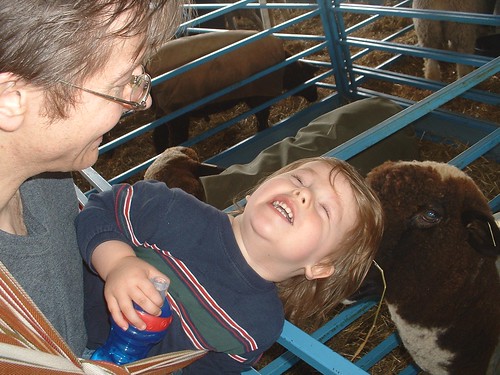

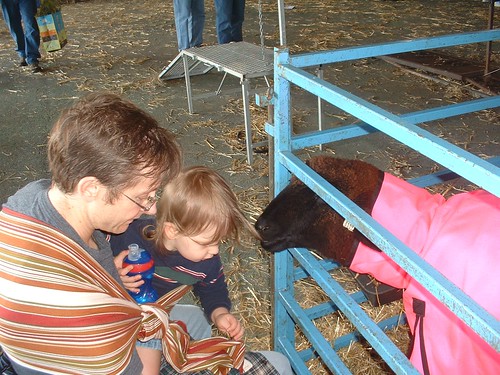
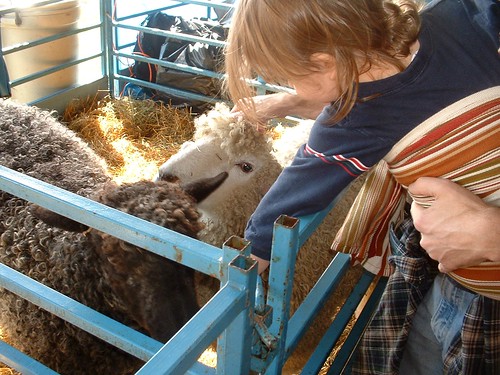
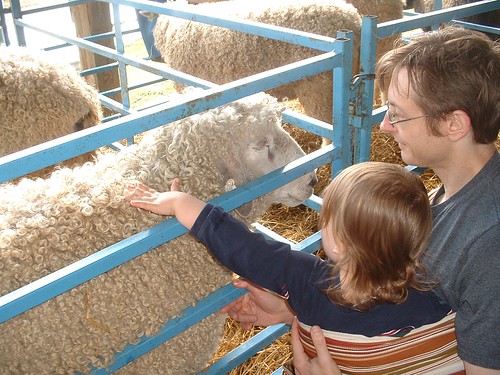
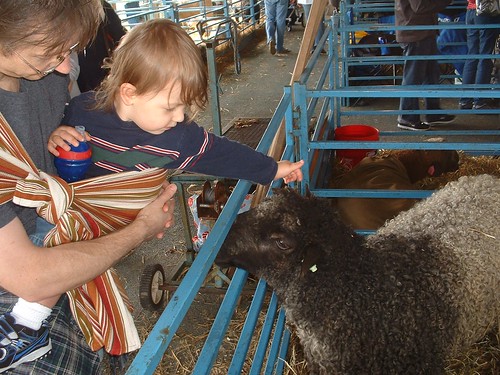
Then it was over to the goats. We started to watch an angora goat getting its first shearing, but it was a bit distressed and The Llama started to get upset so we moved on. The Llama enjoyed petting the goats too, but was startled when a few decided to ram at their neighbors. One nice lady let him feed her goats, which was really fun. After that he kept trying to give all the animals bits of hay.
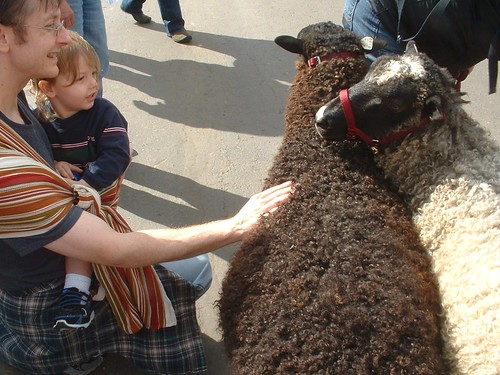
On our way out of the barn we spotted some mini sheep (Shetlands) and we had to stop and pet them too!
After that we wandered around some more, went through the Llama barn (the Llamas weren't very sociable, so no pictures), tasted and bought some cheese, and sat down to eat another snack and have another run around, then it was time to head home. Now we are relaxing after a very fun filled day!
We just got back from the NY Sheep and Wool Festival. I didn't buy any yarn this year, but The Llama got to see a ton of his namesakes, and pet tons of sheep and goats.
It was a beautiful ride down (and back) but The Llama missed most of it because he fell asleep both ways.


We arrived just in time for the llama parade. We couldn’t really get close enough to pet any of them, but The Llama enjoyed pointing at them, and there was much squealing and giggling.

After a break for a snack and some time to run around we headed over to the sheep barn. The Llama LOVED petting the sheep, and kept trying to rub his face against them (we have a cat and he has learned from her how to show affection) he was fascinated when they Baa-ed and kept baa-ing back.


Then it was over to the goats. We started to watch an angora goat getting its first shearing, but it was a bit distressed and The Llama started to get upset so we moved on. The Llama enjoyed petting the goats too, but was startled when a few decided to ram at their neighbors. One nice lady let him feed her goats, which was really fun. After that he kept trying to give all the animals bits of hay.


On our way out of the barn we spotted some mini sheep (Shetlands) and we had to stop and pet them too!

After that we wandered around some more, went through the Llama barn (the Llamas weren't very sociable, so no pictures), tasted and bought some cheese, and sat down to eat another snack and have another run around, then it was time to head home. Now we are relaxing after a very fun filled day!
Tuesday, October 11, 2011
I-Spy
The other day I joined a Swap Bot swap where we had to make an I-Spy postcard to send to our partners.
I drew mine up on 8.5x11 paper first then scanned it in to print out on my postcards to send to each of my partners.
Anyway, after I scanned it I printed a full size test sheet and gave it to The Llama, and he had a fun time pointing out the different items and coloring it in. so I figured I would post the full sized image here too so everybody could enjoy it!
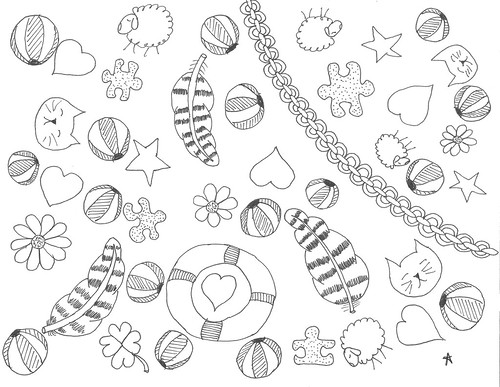
(Click on the picture to go to my Flickr account where you can download the largest size to print.)
I drew mine up on 8.5x11 paper first then scanned it in to print out on my postcards to send to each of my partners.
Anyway, after I scanned it I printed a full size test sheet and gave it to The Llama, and he had a fun time pointing out the different items and coloring it in. so I figured I would post the full sized image here too so everybody could enjoy it!

(Click on the picture to go to my Flickr account where you can download the largest size to print.)
Monday, October 10, 2011
posters
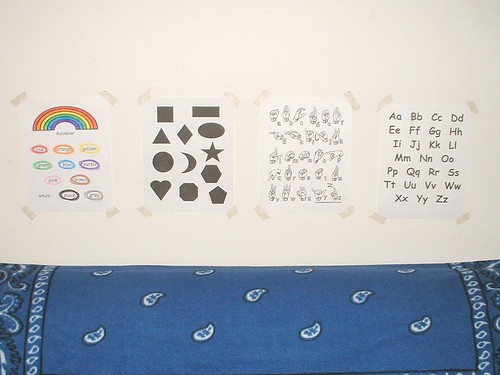
As I said earlier, the Llama has been really interested in the alphabet lately, and also is starting to recognize his colors. In an effort to keep up his interest I made up a handful of posters to put up behind the couch. The Llama will stand on the couch and look at the posters and point to letters, colors, or shapes, and we will tell him what he is pointing at. He will do this for up to 10-15 minutes at a time! Occasionally he will point to something and do the sign for it even before we have a chance to say what it is (or if we don't notice right away that he is pointing).
I did two alphabets because we want to teach The Llama ASL and the finger spelling alphabet, and we know he recognizes pictures and drawings. We still sign the letters to him when he points at the regular alphabet letters too, but the finger spelling one is there for when he just wants to look.
Just this morning The Llama Papa was pointing at colors and The Llama was doing the signs for them without being prompted. It was so cute!
The shapes poster is our most recent addition, and the Llama is fascinated by it and already recognizes and can sign star; the other shapes are a little more difficult because the way to sign most shapes in ASL is to make that shape, so it's a little harder for us to sign them and have him connect them with names, but he LOVES having us name the shapes for him. I think he's excited to have another thing to learn. His little brain just keeps sucking up all the info that it can.
I also like these posters because it gives up a little break from all the running around and craziness that he usually keeps up all day.
Friday, September 30, 2011
Leaps and bounds
A little over a week ago The Llama was having a rough time sleeping at night, with multiple wake ups and looong time to get back to sleep. Poor Llama Papa (who is the night time parent) was having it rough. We thought that part of it may have been the fact the The Llama had outgrown all of his Pjs and was uncomfortable, so we switched to just a t-shirt and sweat pants, and that seemed to help a bit. But now it is definitely clear that part of his unrest was the dawn of several developmental leaps.
The Llama is starting to show a marked interest in all things potty, he is aware of when he is peeing or pooing and will announce it either by grabbing himself, saying “Pee! Pee!” or by doing the appropriate sign. He is also obsessed with the toilet, and loves flushing, and can get quite upset if we don't bring him along when we do our business. We will definitely be purchasing a training potty for him soon!
Also did you notice above? He is actually starting to say simple words! Mostly things that rhyme with pee, but there is definitely a difference in consonant, context and usage, we are very excited. He is also picking up new signs faster than ever! (although he still has difficulty forming some signs especially those requiring his pinkie, so we will occasionally misunderstand him.)
Another new development on the language front is that The Llama is now beginning to recognize the letters of the alphabet and can reliably recognize and sign or say many of the letters including, e,t,y,i,o,p,d,g,j,k,z,c,b and sometimes x, a and s (the last two are very similar signs and it's hard to tell if he recognizes the difference quite yet.) he has also been signing to proper colors before we say them when we read “Freight Train” although we haven't really tested to see if he actually knows the colors or just knows the 'names' of the cars. (which is still pretty impressive!)
He's eating with a spoon and hardly ever spills anymore (unless he's being silly, or experimenting) and is doing much better about keeping his plates and bowl on the table and not spilling/throwing food. He's also starting to be more adventurous again and is eating pretty much exactly what we eat at dinner, plus a few extra vegetables. When he is in a good mood he is much more accepting of being wiped down after messy meals, and in fact he usually can do a pretty good job of cleaning up all on his own. He loves his fruits and veggies, especially grapes, and put away an entire apple at sevensies.
When my parents last visited they brought along a wooden train whistle and a wooden slide whistle. The Llama had never seen anything like them before (except perhaps my penny whistle which I use to play quite a bit but now have hardly any time to practice for the last several months). And he was able to play both of them by the end of the day, and now he delights at whistling them. At the same time we brought out a simple Melissa and Doug board puzzle which he had been given for his last birthday. ( At the time he didn't understand it and we quickly took it away to keep it from being broken.) When we brought it out the other day though, he was not only identifying the farm animals on it, but taking out and putting back the pieces! He doesn't get it right all the time, but he can easily figure out which way to twist a piece to get it to fit, we have some slightly more complicated puzzles (smaller more similarly shaped pieces, with no identifying picture underneath). Which we may pull out in another month or so if he starts getting bored with this one
Sunday, September 11, 2011
Moroccan zucchini soup
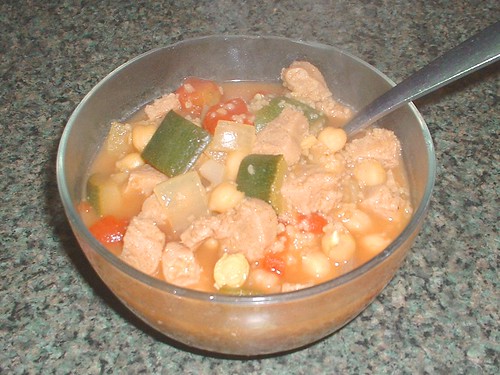
We had this the other night and it was awesome and super simple to make.
2 C dried chickpeas, soaked overnight
1 bay leaf
1 lg onion, chopped fine
2 teaspoons garam masala
5 cups low-sodium veg broth + extra water as needed
1 (28-oz) can diced tomatoes
2 zucchini, cut into 1/2-inch pieces
1 cup plain whole wheat couscous
¼ cup nutritional yeast
1 tablespoon soy sauce
2 cups large chunk TVP
Drain and rinse the chickpeas, cover them with the broth, add the bay leaf and simmer for about 1 hr, or until tender.
When the chickpeas are tender, saute the onions in a separate pan until they go translucent, add the garlic and saute a minute more. Add the onions to the chick peas, and deglaze the pan with a little bit of chickpea liquid.
Add the rest of the ingredients and some extra water if needed and cook until the TVP is tender.
Adapted from the Moroccan Chicken Soup recipe from America’s Test Kitchen 30-Minute Suppers
Saturday, August 27, 2011
I think I may have just finished the coolest (and easiest) craft ever.
Ok, maybe not ever, but this turned out so awesome, I love it!
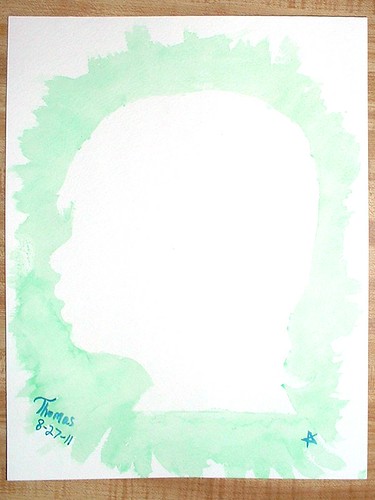
Isn't that awesome looking?
I used this tutorial to make the silhouette and ended up with this:

then I printed it, carefully cut it out, and stuck it to a piece of watercolor paper, then I just quickly brushed all along the edge with paint!
Once it dried a little I took the silhouette off and touched up the edges a bit, and ta da!
I made this for my mother who is visiting this weekend. But in the morning I'm going to make a few more to give to my grandmother and the Llama Poppa's mother, and another for us!
{edit}
here they all are together. I am so happy with these! I sent them off with my mother today to be framed and so everybody can choose the one they want.
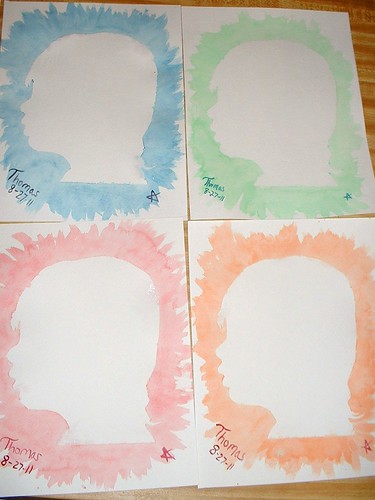

Isn't that awesome looking?
I used this tutorial to make the silhouette and ended up with this:

then I printed it, carefully cut it out, and stuck it to a piece of watercolor paper, then I just quickly brushed all along the edge with paint!
Once it dried a little I took the silhouette off and touched up the edges a bit, and ta da!
I made this for my mother who is visiting this weekend. But in the morning I'm going to make a few more to give to my grandmother and the Llama Poppa's mother, and another for us!
{edit}
here they all are together. I am so happy with these! I sent them off with my mother today to be framed and so everybody can choose the one they want.

Sunday, August 14, 2011
Zentangle
I know this isn't strictly Llama related, but I think I have a new obsession.
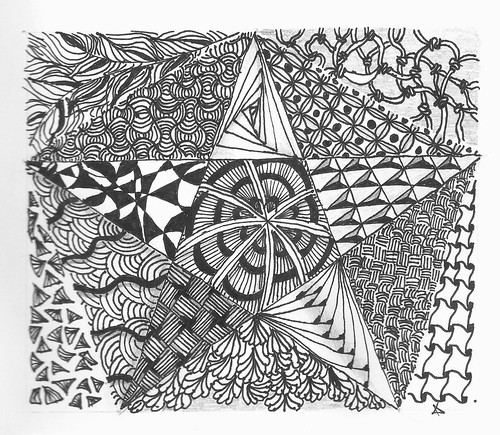
Zentangle its a type of doodling using a step by step process to create complicated looking 'tangles' combined together to create a 'zentangle' only using a simple pen, and no erasing. The step by step and black and white nature is supposed to be very meditative and calming, hence the 'zen'. I had an amazon gift card to spend, so I got Sandy Bartholomew's Totally Tangled, and I LOVE IT! There are so many tangles and ideas, I really want to get her other books now too.
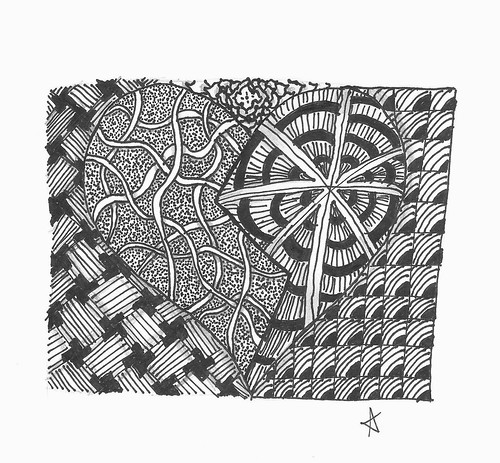
I have gone through pages and pages in my sketchbook already and its only been about a week and a half since I discovered it. I find them so fun, and yes, meditative. I know it sounds kinda woo, but making these drawings really is so meditative and relaxing. and the result is always so nifty. If I'm having a hard or stressful day with the Llama, I find if I take a few minutes (while he is eating lunch or dinner) to draw, that I feel not necessarily refreshed, but more mellow, and better able to cope whatever frustrations come my way.

I've cut up a sheet of watercolor paper and am working on a bunch of bookmarks now. I think that I will be adding a tangled bookmark to the holiday gifts this year, so much of our family are readers that I know they will be appreciated.

I only just received Sandy's book on Thursday, most of my tangling so far has been done using resources from the internet, so it is totally doable even without all the official accoutrement! Heck you don't even need any of the fancy little squares or expensive pens if you can't get them, a lot of my tangles have been on regular printer paper using a sharpie ultra fine! (Although I do admit that the Sakura pens make a much finer line, with no bleeding like you can get with the sharpie pens.)

For more info in zentangles check out the zentangle blog or thezentangle patterns website and my favorite zentangle teacher/blogger/author Sandy Bartholomew at her blog (seriously, buy her books if you are interested in Zentangle, she is really awesome)
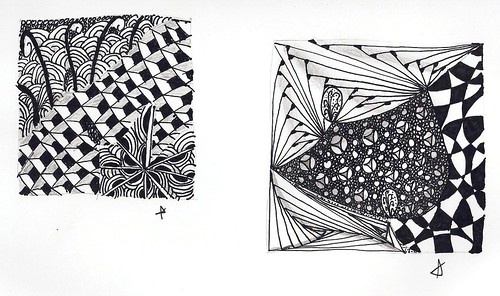


Zentangle its a type of doodling using a step by step process to create complicated looking 'tangles' combined together to create a 'zentangle' only using a simple pen, and no erasing. The step by step and black and white nature is supposed to be very meditative and calming, hence the 'zen'. I had an amazon gift card to spend, so I got Sandy Bartholomew's Totally Tangled, and I LOVE IT! There are so many tangles and ideas, I really want to get her other books now too.

I have gone through pages and pages in my sketchbook already and its only been about a week and a half since I discovered it. I find them so fun, and yes, meditative. I know it sounds kinda woo, but making these drawings really is so meditative and relaxing. and the result is always so nifty. If I'm having a hard or stressful day with the Llama, I find if I take a few minutes (while he is eating lunch or dinner) to draw, that I feel not necessarily refreshed, but more mellow, and better able to cope whatever frustrations come my way.

I've cut up a sheet of watercolor paper and am working on a bunch of bookmarks now. I think that I will be adding a tangled bookmark to the holiday gifts this year, so much of our family are readers that I know they will be appreciated.

I only just received Sandy's book on Thursday, most of my tangling so far has been done using resources from the internet, so it is totally doable even without all the official accoutrement! Heck you don't even need any of the fancy little squares or expensive pens if you can't get them, a lot of my tangles have been on regular printer paper using a sharpie ultra fine! (Although I do admit that the Sakura pens make a much finer line, with no bleeding like you can get with the sharpie pens.)

For more info in zentangles check out the zentangle blog or thezentangle patterns website and my favorite zentangle teacher/blogger/author Sandy Bartholomew at her blog (seriously, buy her books if you are interested in Zentangle, she is really awesome)


Saturday, August 6, 2011
art envelopes
Lately the Llama has been on a coloring kick, every day he wants so color and can crank out several sheets of Llama art a day!
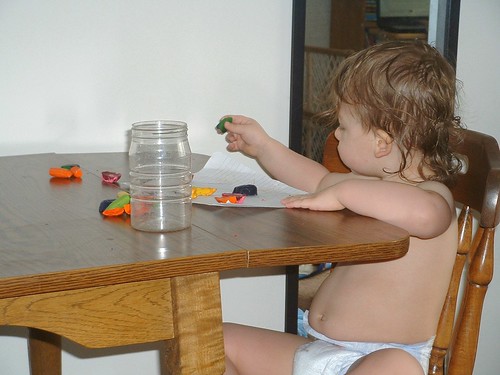
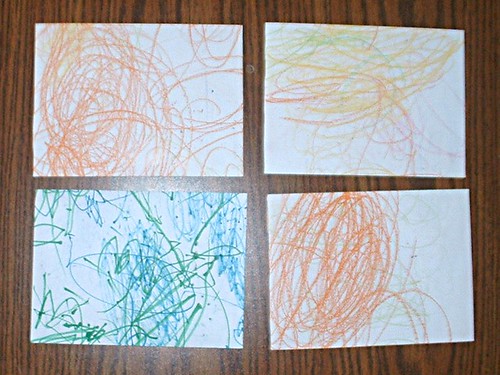
Needless to say, I am running out of room to display it all! But then I had a great idea, why not turn all that awesome Llama art into envelopes to use when we send letters and handmade cards? So I did!
It's a super simple process, and I'll show you how to do it too!
First you will need an envelope template. Since we make our cards using 9 x 12 watercolor paper cut in half (making 6 x 4 1/2 folded cards) I decided to make A6 envelopes (4 3/4 x 6 1/2). You can make any size you want, just be sure that it will go through the post without any extra charge (go here to see the sizing rules for first class letters).
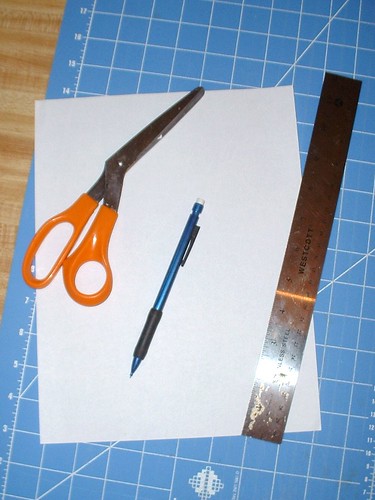
First, gather your tools: you will need a piece of 8 1/2 x 11 printer paper, a ruler, a pencil and some scissors. You may also want a piece of 8 1/2 x 11 cardstock to use for your final template.
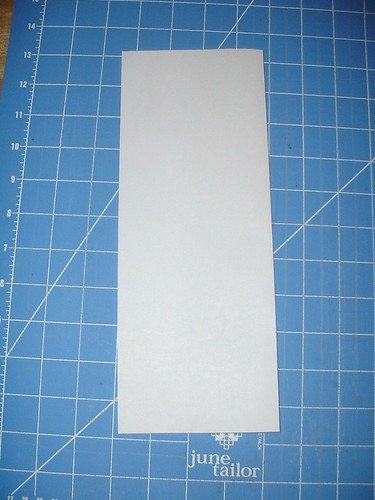
Fold your paper in half the long way with the fold on your right.
Now measure and draw your guide lines.
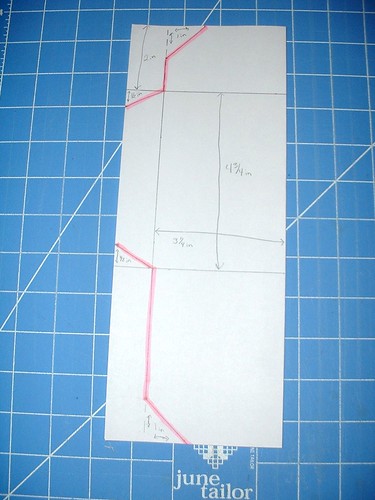
*First draw a horizontal line 2 inches from the top.
*Next draw a parallel line 4 3/4 inches down from your first line.
*Now draw a vertical line 3 1/4 inches in from the folded edge.
*The rectangle you just created is the 'body' of your envelope, the 1 x 4 3/4 inch rectangle to the side is for the side flaps, and the large rectangles on top and bottom are for the back and top flaps.
*To make the flaps angled, mark 1 inch on the side and top of the left hand corner of the top flap, and draw a line connecting them; do the same for the side and bottom of the back flap. For the side flaps make a mark 1/2 inch down from the top, and 1/2 inch up from the bottom edge, and draw an angled line connecting the mark to the corner of the envelope body. (If this step is confusing, look at the picture for help.)
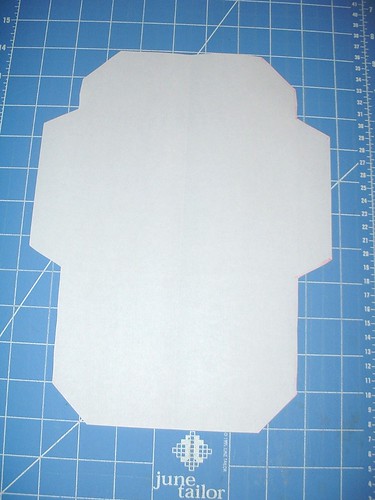
* Cut both layers along the highlighted line, unfold and you have your template! You may want to trace this onto a piece of cardstock for a sturdier and longer lasting template.
***
Now to make an envelope:
Gather your materials, your paper, a ruler, your template, scissors, or an exacto knife and cutting mat, a glue stick, and (optional) a bone folder
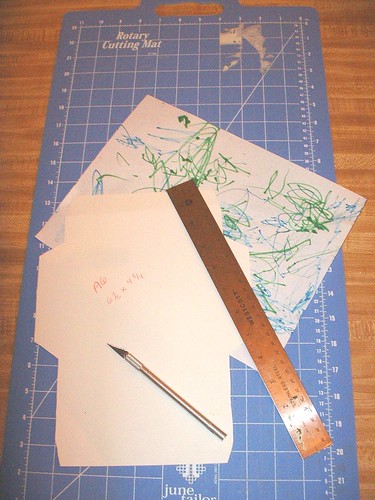
First lay out your paper and place the template over it. (If you are using a catalog or magazine page your template will likely be larger than your paper; be sure that you have at least 1/2 inch on each side for the flaps, and that the paper is no more than 1 inch short: center the template.)
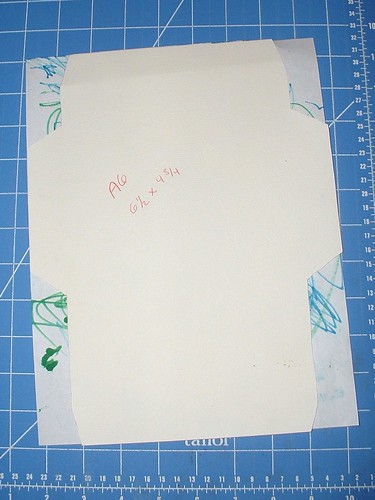
Now either trace your template and cut out with your scissors, or use your exacto knife.
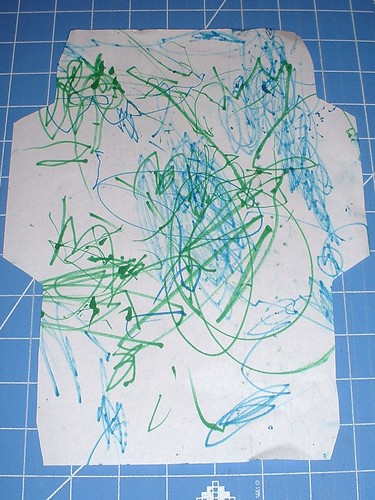
Place your ruler along the inside edge of each flap and use your bone folder to score your fold lines.
(I don’t have a bone folder but I find that the back edge of my exacto knife works just as well if I use very light pressure.)
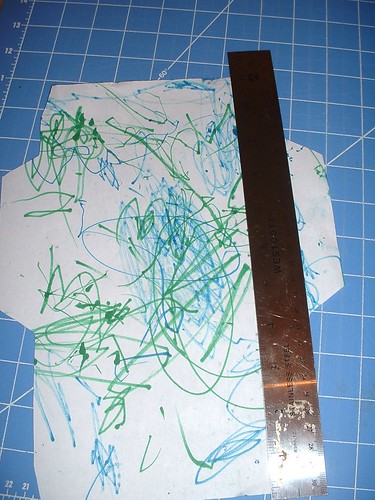
Fold along your score lines.
Use your glue stick on the two side flaps, and stick your back flap in place.
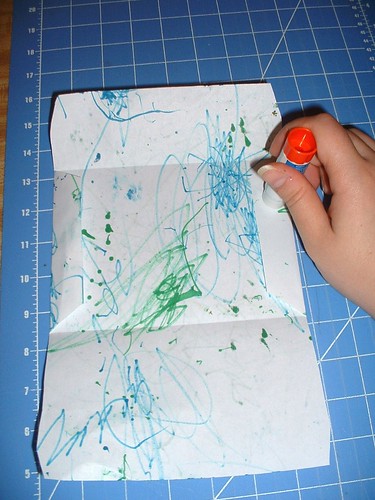
Ta Da! You now have an awesome custom envelope.
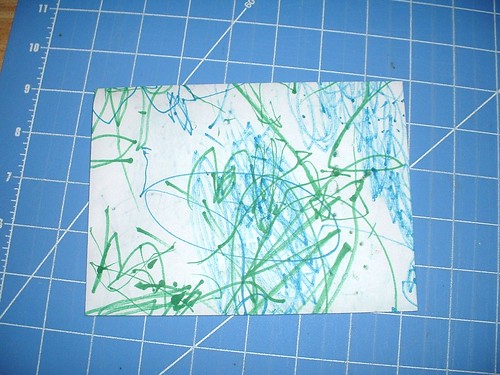
When you are ready to send it just use your glue stick on the flap to seal it and some white labels to write the address.

Needless to say, I am running out of room to display it all! But then I had a great idea, why not turn all that awesome Llama art into envelopes to use when we send letters and handmade cards? So I did!

It's a super simple process, and I'll show you how to do it too!
First you will need an envelope template. Since we make our cards using 9 x 12 watercolor paper cut in half (making 6 x 4 1/2 folded cards) I decided to make A6 envelopes (4 3/4 x 6 1/2). You can make any size you want, just be sure that it will go through the post without any extra charge (go here to see the sizing rules for first class letters).
First, gather your tools: you will need a piece of 8 1/2 x 11 printer paper, a ruler, a pencil and some scissors. You may also want a piece of 8 1/2 x 11 cardstock to use for your final template.

Fold your paper in half the long way with the fold on your right.

Now measure and draw your guide lines.

*First draw a horizontal line 2 inches from the top.
*Next draw a parallel line 4 3/4 inches down from your first line.
*Now draw a vertical line 3 1/4 inches in from the folded edge.
*The rectangle you just created is the 'body' of your envelope, the 1 x 4 3/4 inch rectangle to the side is for the side flaps, and the large rectangles on top and bottom are for the back and top flaps.
*To make the flaps angled, mark 1 inch on the side and top of the left hand corner of the top flap, and draw a line connecting them; do the same for the side and bottom of the back flap. For the side flaps make a mark 1/2 inch down from the top, and 1/2 inch up from the bottom edge, and draw an angled line connecting the mark to the corner of the envelope body. (If this step is confusing, look at the picture for help.)
* Cut both layers along the highlighted line, unfold and you have your template! You may want to trace this onto a piece of cardstock for a sturdier and longer lasting template.

***
Now to make an envelope:
Gather your materials, your paper, a ruler, your template, scissors, or an exacto knife and cutting mat, a glue stick, and (optional) a bone folder

First lay out your paper and place the template over it. (If you are using a catalog or magazine page your template will likely be larger than your paper; be sure that you have at least 1/2 inch on each side for the flaps, and that the paper is no more than 1 inch short: center the template.)

Now either trace your template and cut out with your scissors, or use your exacto knife.

Place your ruler along the inside edge of each flap and use your bone folder to score your fold lines.
(I don’t have a bone folder but I find that the back edge of my exacto knife works just as well if I use very light pressure.)

Fold along your score lines.
Use your glue stick on the two side flaps, and stick your back flap in place.

Ta Da! You now have an awesome custom envelope.

When you are ready to send it just use your glue stick on the flap to seal it and some white labels to write the address.
Wednesday, August 3, 2011
Sign it
The Llama continues to learn more and more signs, lately he's been doing signs that even the Llama Papa and I don't know!
Here are some of the signs he has learned since my last update
Bath
Blocks
Brush hair
Bunny
Car
Carrot
Chicken
Clean up
Clothes
Corn
Cracker
Dog
Fish
Fruit
Grapes
Happy
Mouse
Pants
Pig
Potty
Red
Sheep
Shirt
Sit
That's 57 signs! Wow! No wonder the Llama Papa and I are having trouble keeping up!
Here are some of the signs he has learned since my last update
Bath
Blocks
Brush hair
Bunny
Car
Carrot
Chicken
Clean up
Clothes
Corn
Cracker
Dog
Fish
Fruit
Grapes
Happy
Mouse
Pants
Pig
Potty
Red
Sheep
Shirt
Sit
That's 57 signs! Wow! No wonder the Llama Papa and I are having trouble keeping up!
Friday, July 29, 2011
Mmmm Gyros
This one got a big thumbs up from everybody in the Llama family, the Llama even ate quite a bit of seitan, which is pretty spectacular since he usually doesn’t like 'meats' and has refused just basic seitan on several occasions.
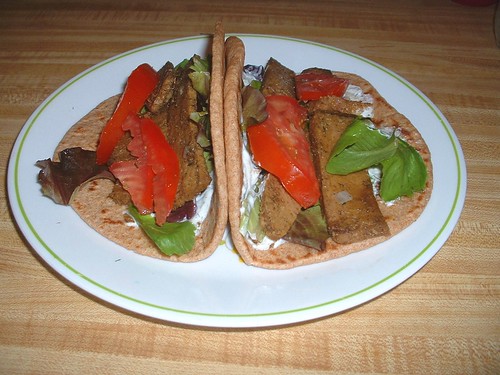
"meat":
seitan, sliced thinly (~ 1/2 a loaf made from this recipe)
2 cloves garlic
1 sm onion
1 tsp cumin
1 1/2 tsp oregano
1 tsp thyme
1/8 tsp cinnamon
1/8 tsp nutmeg
salt & pepper
(I just threw everything into the spice grinder and let it go)
sauté the onions until translucent, add the garlic and cook a little longer. Add the seitan and spices and cook until the seitan is staring to crisp around the edges and the spices are fragrant.
***
Tzatziki:
1/2 cucumber, peeled, grated and drained
1 C Greek yogurt
1 tsp dill
1/2 tsp garlic powder
1 Tbsp lemon juice
salt & pepper
combine everything and let sit several hours to meld.
This makes A LOT of Tzatziki, but that's ok, because it is super yummy, the Llama loves Greek yogurt and cucumbers, and eats this up like crazy.
***
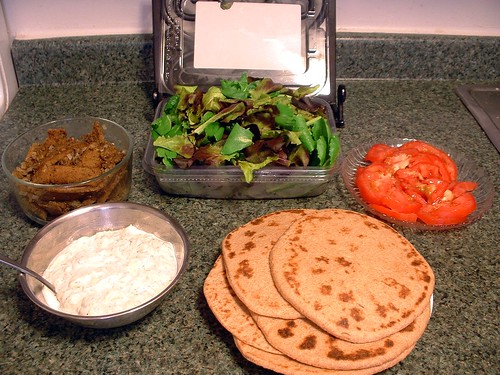
Gyro:
tomatoes
onion
lettuce
seitan
Tzatziki
Naan (I used this recipe)
Layer everything on the naan, fold, and eat!
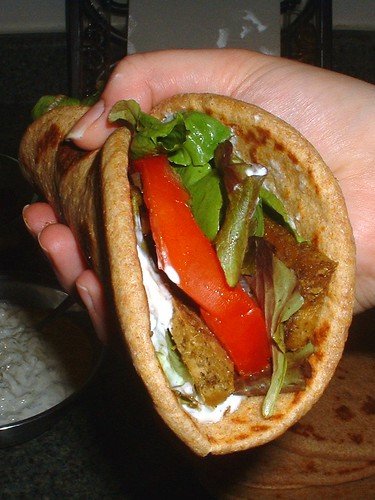
Like I said, this was a big hit, we had plenty of leftovers, and we are all looking forward to tomorrow's dinner.

"meat":
seitan, sliced thinly (~ 1/2 a loaf made from this recipe)
2 cloves garlic
1 sm onion
1 tsp cumin
1 1/2 tsp oregano
1 tsp thyme
1/8 tsp cinnamon
1/8 tsp nutmeg
salt & pepper
(I just threw everything into the spice grinder and let it go)
sauté the onions until translucent, add the garlic and cook a little longer. Add the seitan and spices and cook until the seitan is staring to crisp around the edges and the spices are fragrant.
***
Tzatziki:
1/2 cucumber, peeled, grated and drained
1 C Greek yogurt
1 tsp dill
1/2 tsp garlic powder
1 Tbsp lemon juice
salt & pepper
combine everything and let sit several hours to meld.
This makes A LOT of Tzatziki, but that's ok, because it is super yummy, the Llama loves Greek yogurt and cucumbers, and eats this up like crazy.
***

Gyro:
tomatoes
onion
lettuce
seitan
Tzatziki
Naan (I used this recipe)
Layer everything on the naan, fold, and eat!

Like I said, this was a big hit, we had plenty of leftovers, and we are all looking forward to tomorrow's dinner.
Wednesday, July 27, 2011
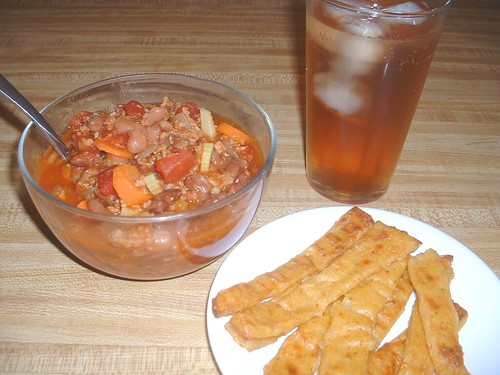
chili and polenta
I made chili tonight for dinner
It's pretty straight forward, and super simple, but we really like it around here, so I figured I would post the recipe:
1 lg onion
3 cloves garlic
1 lg green pepper
2 carrots
2 stalks celery
1 (28 oz) can diced tomatoes
1 (28 oz) can crushed tomatoes (or 1 (28 oz) can diced tomatoes, drained, and whirred in the blender)
2 C dried red kidney beans, cooked
1 Tbsp ground cumin
1 batch chili powder*
1 C granulated TVP
2 Tbsp soy sauce
1 C veg broth
Sauté the onion until translucent, add the garlic and sauté a minute or two more, add the rest of the ingredients and let simmer gently for about an hour. Serve with cornbread or polenta fries. - Enjoy!
Chili powder:
1/8 - 1/2 tsp cayenne*
1 Tbsp cumin seeds
1 Tbsp smoked paprika
1 tsp oregano
1 tsp garlic powder
Throw everything into the spice grinder and whir.
Polenta fries are just this done to this (using veggie stock, and about half the salt) I say 'just' but they are AMAZING!
*because neither I nor the Llama are big fans of super spicy stuff, we opt for the minimal amount of cayenne. Feel to increase the amount to fit your tastes. The Llama Papa is fond of adding a spoon full of red pepper flakes to his bowl of chili.
It's pretty straight forward, and super simple, but we really like it around here, so I figured I would post the recipe:
1 lg onion
3 cloves garlic
1 lg green pepper
2 carrots
2 stalks celery
1 (28 oz) can diced tomatoes
1 (28 oz) can crushed tomatoes (or 1 (28 oz) can diced tomatoes, drained, and whirred in the blender)
2 C dried red kidney beans, cooked
1 Tbsp ground cumin
1 batch chili powder*
1 C granulated TVP
2 Tbsp soy sauce
1 C veg broth
Sauté the onion until translucent, add the garlic and sauté a minute or two more, add the rest of the ingredients and let simmer gently for about an hour. Serve with cornbread or polenta fries. - Enjoy!

Chili powder:
1/8 - 1/2 tsp cayenne*
1 Tbsp cumin seeds
1 Tbsp smoked paprika
1 tsp oregano
1 tsp garlic powder
Throw everything into the spice grinder and whir.
Polenta fries are just this done to this (using veggie stock, and about half the salt) I say 'just' but they are AMAZING!
*because neither I nor the Llama are big fans of super spicy stuff, we opt for the minimal amount of cayenne. Feel to increase the amount to fit your tastes. The Llama Papa is fond of adding a spoon full of red pepper flakes to his bowl of chili.
Saturday, July 23, 2011
CSA adventures
The other day we got a portion of a friends CSA box. In it was a bunch of radishes, which we don't really eat that often. Or at all really, I've always found the ones from the supermarket to be rather bland and tasteless, but these radishes are really ... powerful, like mild parsnip with a STRONG peppercorn chaser.
We were at a loss for what to use them for, but then I saw a recipe for radish chips and decided to give it a go. But of course I had to fancy it up a bit; this is what I ended up with:
3 large radishes slice thin, but not paper thin.
1/2 tsp Cajun spice
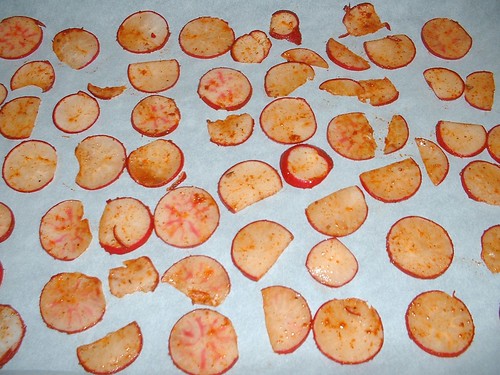
Preheat the oven to 325
Toss the radishes with the spice until they are all evenly coated
Lay them all out on a baking sheet and bake for about 10-15 minutes, turn them over, turn off the heat and leave them in the oven for another 1/2 hr. easy!
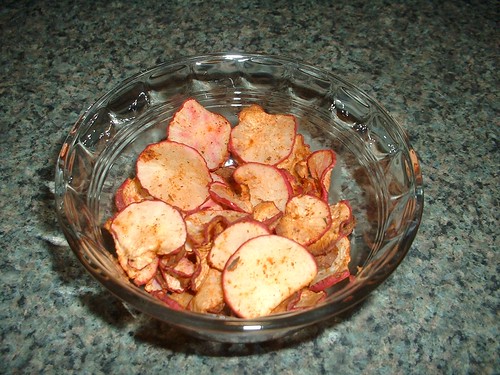
(this was after only 10 more minutes in the oven, they weren't really crisp enough, so I put them back, they were perfect after about 1/2 hr.)
the Llama Papa really liked them (he ate the whole bowl!), and said that they would be great on a salad, like croutons, but better. We have several more radishes, so I'm definitely doing this with the rest of them!
Oh, you want the Cajun spice recipe too? This is a general spice that we use for all sorts of things; it's especially good on popcorn:
1/4 c smoked paprika
1 T garlic powder
1 T onion powder
1 T salt
1 T thyme
1 T oregano
1 T pepper
1 t basil
1 t cumin
1/4 t cayenne
I use whole peppercorns and cumin, so I just throw everything into the spice grinder and whirred it all together.
Also in the box are a ton of salad greens, which means we needed salad dressing!
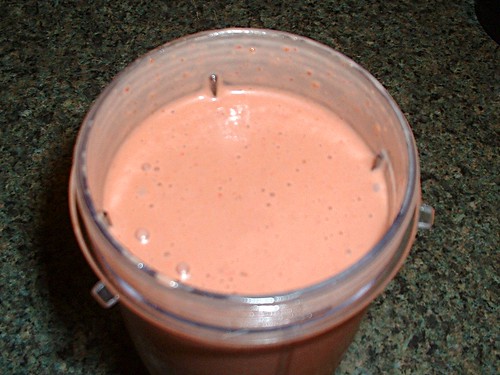
Strawberry Vinaigrette
1 1/2 C frozen strawberries*
2 Tbsp apple cider vinegar
2 Tbsp balsamic vinegar
2 Tbsp sugar**
1 Tbsp Dijon mustard
1/2 C oil
1/2 C water
Whir everything together in the blender until combined.
Serve on top of an awesome salad.
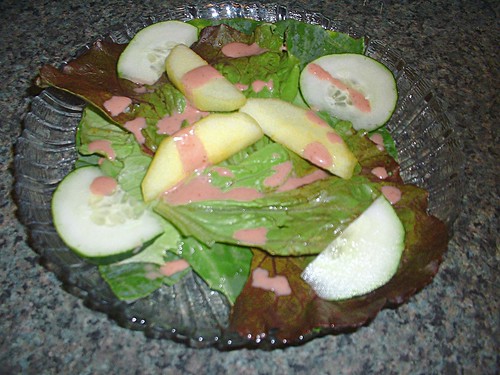
* this could be made with raspberries or any other berry too, but if using a smaller, more compact berry you only need one cup. The strawberries never really fit well in the measuring cup, so I add more to compensate.
** a more tart berry might need a touch more, a sweeter berry less.
We were at a loss for what to use them for, but then I saw a recipe for radish chips and decided to give it a go. But of course I had to fancy it up a bit; this is what I ended up with:
3 large radishes slice thin, but not paper thin.
1/2 tsp Cajun spice

Preheat the oven to 325
Toss the radishes with the spice until they are all evenly coated
Lay them all out on a baking sheet and bake for about 10-15 minutes, turn them over, turn off the heat and leave them in the oven for another 1/2 hr. easy!

(this was after only 10 more minutes in the oven, they weren't really crisp enough, so I put them back, they were perfect after about 1/2 hr.)
the Llama Papa really liked them (he ate the whole bowl!), and said that they would be great on a salad, like croutons, but better. We have several more radishes, so I'm definitely doing this with the rest of them!
Oh, you want the Cajun spice recipe too? This is a general spice that we use for all sorts of things; it's especially good on popcorn:
1/4 c smoked paprika
1 T garlic powder
1 T onion powder
1 T salt
1 T thyme
1 T oregano
1 T pepper
1 t basil
1 t cumin
1/4 t cayenne
I use whole peppercorns and cumin, so I just throw everything into the spice grinder and whirred it all together.
Also in the box are a ton of salad greens, which means we needed salad dressing!

Strawberry Vinaigrette
1 1/2 C frozen strawberries*
2 Tbsp apple cider vinegar
2 Tbsp balsamic vinegar
2 Tbsp sugar**
1 Tbsp Dijon mustard
1/2 C oil
1/2 C water
Whir everything together in the blender until combined.
Serve on top of an awesome salad.

* this could be made with raspberries or any other berry too, but if using a smaller, more compact berry you only need one cup. The strawberries never really fit well in the measuring cup, so I add more to compensate.
** a more tart berry might need a touch more, a sweeter berry less.
Subscribe to:
Comments (Atom)